EZLit Sign Installation Instructions
Download Installation Instructions (PDF)
Sign Parts Names referred to in the Instructions
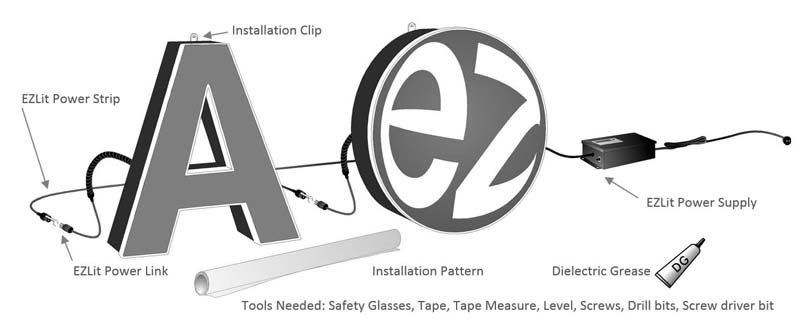
Tools Needed: Safety Glasses, Tape, Tape Measure, Level, Screws, Drill bits, Screw driver bit
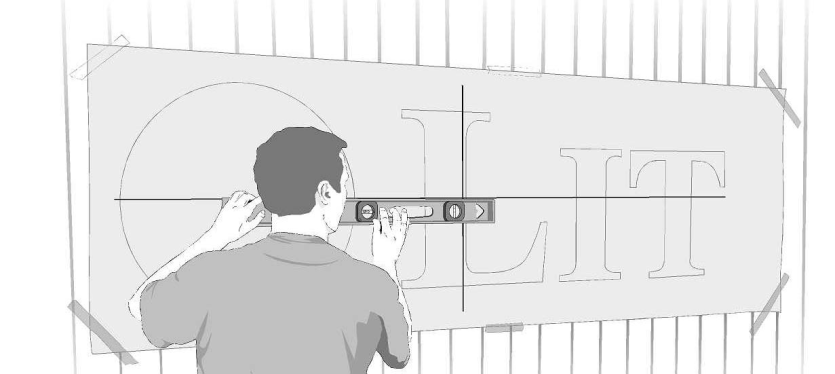
Step 1
Unroll pattern and tape to wall where letters are to be installed.
Check to make sure letters are level and centered in the area.
There must be access to the back of the wall to connect EZLit Power Link to the EZLit Power Strip. Use a tape that will not damage the wall surface when it is removed. For brick you can use duct tape but remove as soon as done.
Do not level with the bottoms of the letters or edge of paper, use provided level lines only.
Step 2 Drill Holes
Mounting Holes  are on the outside of Letters and Logos.
Drill pilot holes through the center of the mark for appropriate fastener.
For wood surfaces we suggest galvanized wood screws. They can be painted to match wall. Concrete, Brick or cinderblock surfaces we suggest Tapcon® Screws. Your hardware store may suggest another type that will work for your application.

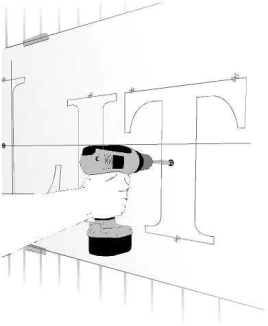
  are in the middle of the Letters & Logos.
 are in the middle of the Letters & Logos.Drill a 3/4” hole completely through the wall to the inside of the building.
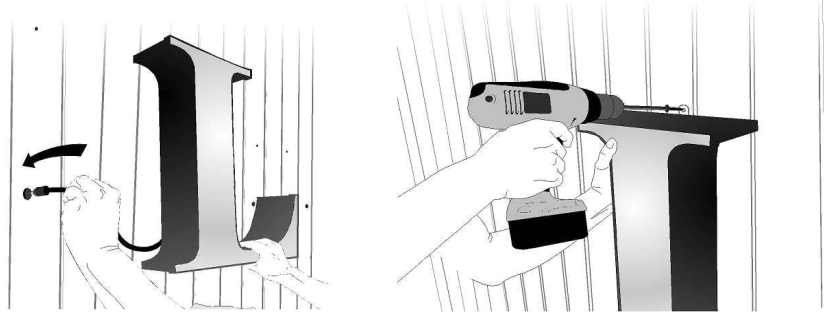
Step 3 Installing Letters
It is best to remove tape as soon as possible.

On the back of the Letters & Logos there is a sticker, this sticker will tell you the sequence the Letters & Logos are to be installed.
Installation Letters & Logos on the wall using screws appropriate for the wall.
Screw is to be put through hole in the mounting tab and into pilot hole from pattern.
While putting letters on the wall shove the EZLit Power Link through the wall so it can be reached from inside the building.
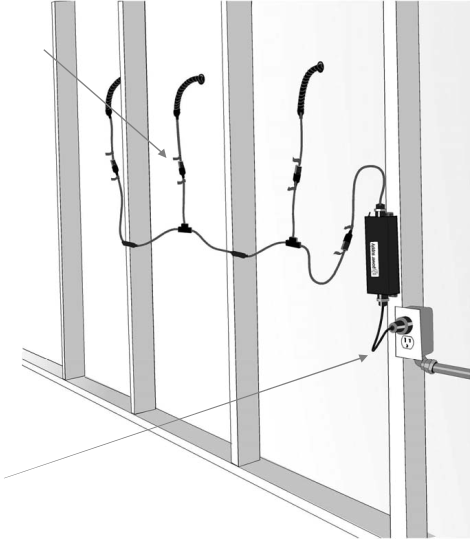
Step 4 Install Power Strip
On the Back side of the wall, plug each letters in to the EZLit Power Strip and the EZLit Power Supply.
Each Power Link has a colored tag should match the color tag on the Power Strip.
* Apply Dielectric Grease (included with sign) to metal parts of each Plug Connection
Plug the EZLit Power Strip into a 110 volt outlet.
The Power Supply gets warm and should be in the open air.
Do not put the power supply in a container or cover it with combustible materials.
The sign will be on all the time. You can turn them on or off with the switch or purchase a lamp timer at the hardware store.
Power supply must be indoors, it is not weather proof.
A loop of wire should hang down below the outlet.
This will prevent water running down cord and into the socket.
 Wear Safety Glasses when drilling holes